Specs:
- Type: Generation 1
- 8 GB RAM (dynamic)
- Default storage
- 4 vCPUs
- Stock Ubuntu Server 20.04 LTS ISO
Observation:
No matter what I tried — ensuring Default Network Adapter settings were set to External, or creating a Legacy Network adapter — nothing made a connection inside the VM.
Solution:
I re-rolled it.
- Deleted the Gen 1 VM and created a Gen 2 VM instead.
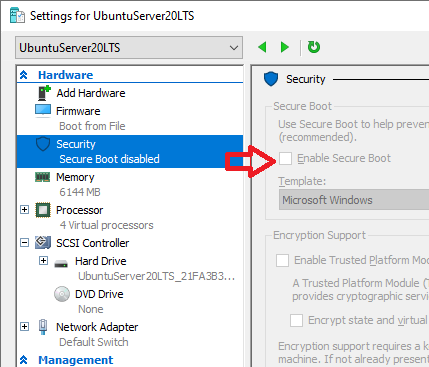
- Had to turn off Secure Boot in Settings for it to boot at all. This is a test VM, so security was not a consideration — plan accordingly.
Extras:
- Enhanced session with linux-vm-tools: https://github.com/Microsoft/linux-vm-tools/wiki/Onboarding:-Ubuntu